Tips for each Class
In this section I'll give you the stats for each class, as well as info on how to help your team using that class, sneaky tactics you can use, and how to XP whore with that class (if you're into that kind of thing!)
You should pick one class to get really good at, but make sure to try all the different classes. Each one will give you new insights into how the game works, and teach you new ways of playing. For example, being an engy helps you learn mining spots, or being a medic helps you learn how to use your radar.
Weapons: Panzerfaust, Flamethrower, Mortar, Mobile
MG42, MP40/Thompson
Abilities: Kill!
Pros: Loads of frags, spawncamping
Cons: Fragging is all you can do
Basically if you're a soldier, you are your weapon. You're a killing machine, and that's really all you have to do. So, read the section on weapons for information ;) The job of a soldier may include defending an area, clearing out an area so teammates can get through, or spawncamping to cut off the enemy's flow of reinforcements.
There are some general things to keep in mind though... Don't be a soldier with an SMG, might as well use something powerful like a panzer. The only reason the SMG is included in the soldier's arsenal is so that you can steal an SMG off the ground if your panzer is recharging, or you're out of ammo, etc. Also, once you get level 4 heavy, you'll be able to carry an SMG instead of a pistol.
Get ammo if you need it :) If you are an MG in particular, try to get the field ops to provide you with some ammo every time he spawns.
At the beginning when you have level 0 heavy weapons, panzers and mortars are a bit crappy because your charge bar will recharge at a very slow rate. So try to get 20+ heavy weapons XP as quick as possible, using any method possible.
Learn how to get really good at spawncamping. This is one of the best features of a soldier, and if you play competitively in a clan, you'll be at a real disadvantage if none of the soldiers in your clan know how to spawncamp. (Because you can be sure as hell the enemies will do it to you!) Try to get clumps of kills at the same time if you can. Also check out the Heron Spawntimer. For information about whether Heron is cheating, go here.
Memorize all the best spots to MG, panzer, mortar, etc. If you're a mortar in particular, you should have the exact angles memorized so you don't have to experiment every time to find the right angle.
Weapons: MP40/Thompson
Abilities: Health packs, Revives, Adrenaline
Pros: Heal yourself, good XP whoring, your team loves you
Cons: Not much ammo
Basic info:
Medics are crucial to any team. Not only do they support the team with
healing and reviving, but for every medic you have on your team, everybody
receives an HP bonus. Armed with an SMG and loads of health, they also are very
effective killers, especially if you are an accurate shooter.
Below I've made a chart showing how the bonuses work. Depending on how many medics are on your team, and whether you are a medic or a non-medic, your HP will vary.
To read this chart, notice that the HP is listed as 3 numbers, for example "120-134-151". What this means is you have 120 initial HP when you spawn, but your max HP is 134. If you have level 3 battle sense, then your max HP is 151.
| # Medics | HP (non-medic) | HP (medic) |
| 0 | 100-100-115 | N/A |
| 1 | 110-110-125 | 110-123-140 |
| 2 | 120-120-135 | 120-134-151 |
| 3+ | 125-125-140 | 125-140-156 |
One interesting thing to note here is that non-medics always spawn with their max HP, unless they have level 3 battle sense. So, if you're at the beginning of a campaign or something, and nobody has had a chance to get a lot of XP yet, then don't bother dropping health packs around the spawn- nobody needs them. However, if there are some teammates who have level 3 battle sense, then you definitely should drop health packs for them at the beginning. If you don't, then their +15 health bonus goes to waste because they spawn with less HP.
Another thing to note is that, it's a good idea to have 2 medics because then everybody gets a nice +20 HP bonus. You could have 3, but it only gives you an additional +5 HP compared to 2 medics.
Since most teams have more than one medic, it's best if you try to split up your coverage. You don't want for example, 3 medics in one area, and the rest of your team somewhere else. If you are playing defense and trying to hold specific chokepoints, then coordinate which medics will cover which points. If you are on offense then make sure that for each assault team there is at least one medic.
So, being a good medic is largely about being at the right place at the right time. You should stay aware of what's going on around you. If some teammates are trying to launch an assault or infiltrate a base, go run with them! If you don't know where you should be going, then just look around you when you spawn and find someone to run with. Usually I go with engies or field ops. Engies are a good choice because they're usually crucial to a mission. Field ops are great because then they can supply you with ammo while you heal them.
If you are supporting a teammate, help him out in the fighting. Don't just let him get slaughtered and then go in to revive him- there isn't always time. You might get killed while reviving him, or the enemy might gib them quickly. Just remember, two guns is better than 1.
However, if you are supporting multiple teammates, then you should stay back a little instead of rushing forwards. If you already have 3 guns, having 4 isn't going to make a huge difference. You need to stay alive in this case, because as long as you are alive, there's still hope for your teammates. Once the medic dies, teammates tend to die pretty quickly.
If there are two medics supporting the group, then you could have one medic fighting while one medic hangs back so he can revive as necessary.
Medics should constantly scan teammates to see who is low on health. Also, scan for covert ops! Since medics are constantly scanning teammates, they are usually the first one to notice an enemy in disguise. (With the exception of level 4 field ops). So, if there's a covert in disguise in the area, you should be the first to spot him and open fire. Of course, if you're playing in a clan, this isn't so important because you guys will all be on one fireteam so you can see a symbol above the heads of your teammates.
Get REALLY good at using the map and compass to spot where people are and where they need help. Read the sections on "Interface basics" and "Map walkthroughs" to learn tips on how to quickly locate wounded teammates, and how to use landmarks and symbols on the map to quickly figure out where someone is. You have to be able to do this quickly, even if you're getting shot while 3 guys are spamming the text for a medic. It takes some practice, but knowing how to use the compass effectively will make you better than 90% of the medics out there.
Keep busy. If you're not busy, you're not doing your job. If there's nothing to do at the moment, take a little walk, and check on how your teammates are doing. Support them with your SMG when necessary, or give them health/revives. Pay special attention to your engineers if you are allies- if the engineers are getting killed every time they try to complete the objectives, you won't get anywhere.
If there's nothing happening, then drop some health packs in an area which is highly trafficked by your teammates, or where they are likely to flee. For example, sometimes if I'm about to exit from a cave into dangerous territory, I drop a couple of health packs in the cave in case I, or a teammate, needs to take cover.
Don't forget that the role of a medic isn't just about reviving people once they're dead. Ideally, you should do what you can to prevent your teammates from dying at all! So, don't hesitate to jump in and use your gun. Also, exploit the fact that you have a lot of health. If you see someone low on health and under fire, go rush the enemy so he is forced to switch targets to you. Or, if you have to steal some objective, be the one to take it. If you have to escort a vehicle such as the tug on railgun or a tank or truck, be the one to escort it. Especially if you have adrenaline, the medic is great for taking a hit for the team.
Health packs:
When you start out, you'll probably find that the demand for health packs is
more than you can fill because packs eat up your charge bar so much. So, until you attain level 2 first aid (which gives you
more health packs), don't waste packs. Pay close attention to your teammates'
health and give them packs whenever they need them. Don't heal other medics.
Once you reach level 2, you might find that you often have more health packs than you need. So, don't just wait until someone asks you for it before you give it to them. Instead, drop them all over the ground in common places where people are losing HP. This is important because:
It's still useful to heal individual people from time to time, although this becomes less important once you get level 3 first aid where you can start tk-reviving. Once I get TK-revives, for the most part health packs are just a backup plan, like "if I'm not around when you need me, take some of these."
Try to prioritize who you heal. Don't heal mortars since they hardly ever take any damage.
When you are healing someone, try to stand to the side of him so that you don't block his line of fire. Also be careful not to throw health packs directly in front of an MG or a sniper since it often blocks their vision. While you are healing, also be looking around for signs of enemies. Ideally, the person you are healing should be watching your backs, but often they just stand there looking at you, so make sure to do this!
Sometimes healing people can be a bit frustrating. They might not realize that you are trying to heal them, so I would suggest you hit v6 ("I'm a medic!"). After you hit v6, you could also shoot the ground near them a couple of times to get their attention. If you're using Ventrilo or TeamSpeak, just tell them to pick up the health. If you're on a pub running shrub, use the text shortcuts (see the section on "Scripts and tweaking").
Feel free to use health packs for yourself when you need to. It's important you stay alive, so you can be there for your teammates. However, if you're not in immediate danger and you're not at critical HP, then heal teammates first, since you have regeneration anyways. (Regeneration is how your HP keeps increasing automatically).
Revives:
To revive someone, be quick about it. Sometimes I've seen dumb medics take
forever to aim their syringe at me, and by that time, someone has already
panzered both of us. Remember that a stationary person is the most vulnerable
person in the game so don't stop moving. When you are running towards the body, have your gun out in case you get
attacked. Only once you're close to the body, then you pull your syringe out,
quickly stick them with the needle, heal them if necessary, and then run off.
Do not sacrifice your life to revive someone, especially if you're in good condition (full health, enough ammo). For example, say your teammate is wounded, but nearby there's also an enemy. You could revive the teammate first and then try to fight the enemy, but he might kill you while you have your syringe out. This would be horrible because not only would you die, but most likely your teammate would die as well. Your enemy has an advantage over the newly-revived teammate. Why? Because, your enemy will already have his crosshair lined up on your teammate's head by the time his invulnerability wears off, and meanwhile your teammate may be facing any random direction.
You could kill the enemy first and then revive- but then your teammate may never get the revive- maybe he taps out first because you're taking too long, or you die while fighting the enemy.
So, it is a judgment call- sometimes you may want to sacrifice your life if the wounded person is crucial to your team. But, most of the time I would suggest fighting the enemy first and then reviving.
Another scenario is if you're currently in a safe area but your teammate is in some dangerous area (artillery, or lots of enemies there, etc). In this case, don't bother reviving him. Just say v45 ("Sorry!") and go on with your life. Unless the teammate is doing some vitally important job, there's no point dying over it.
Always check the body for nades. There may be a nade he was priming before he died, or maybe an enemy threw a nade on the body.
While your teammate is getting up, he will be invulnerable for a couple of seconds. Use this to your advantage if you're in a narrow area- you can often "hide" behind your teammate and use him as a shield.
If the body is on stairs, it can be tricky to revive them. You run past them and then run back again, then run past them again, etc. So, instead of missing 5 times with your syringe, get it right the first time: get near their body, then crouch and slowly move directly over their body and use the syringe. In general, crouching quickly while you revive someone is a good idea, so you don't end up missing with your syringe.
Sometimes someone might die on a bridge or something, but you can't tell from the map whether they are on the bridge, or under it. When in doubt, prefer higher ground. If it turns out you're wrong, you can always just jump down. On the other hand, if you went under the bridge and you were wrong, there's no easy way to get to the top of the bridge without doing a lot of running. Try to always stay on higher ground in the first place, so that you can reach teammates faster.
Try to prioritize who you revive. Medics and engies are generally top priority. Use your compass map to tell where your teammates are and how close they are. (The red "medic" sign will appear larger on the compass for people who are closer to you.)
When you get level 3 first aid, you will get full revive, so use TK revives more. You can even use TK revives if you don't have full revives, too. TK revives are very useful if you need to revive someone very quickly, perhaps because they're about to have to do some fighting, or if they're running off somewhere with low health and you don't want to have to chase them down to heal them. When you TK revive, try to follow these guidelines:
Here are some things you should NOT do:
Feel free to use TK revives on other medics, they usually appreciate the help. The only time when you shouldn't do this is if they're already healing themselves.
TK reviving with a knife is sometimes called the medic's "scalpel". Although it might save you 2 bullets, I would strongly recommend avoiding it. Many times teammates won't realize what you're doing, so they'll either shoot back at you, or they'll tap out as soon as they die because they'll assume it was a covert ops knifing them and trying to steal their uni.
Keep in mind that TK revives DO NOT give you XP. (In fact, if the guy files a complaint on you, that's -1 XP). So if you're a low-level medic, try to use health packs more often so you can get to level 2 or 3 quicker.
One problem with TK revives is that it causes your teammate to potentially lose battle sense XP. (Remember, battle sense is awarded for surviving longer). So, some people don't appreciate TK revives. Try to save them for when you need to revive a teammate really quickly or when you're out of health packs. If there's some engy who is just staying around the base and planting landmines, he probably doesn't need to be healed immediately, so give him as many health packs as you can, and then move on to something else.
Adrenaline:
You get this when you get level 4 first aid.
Basically, for a period of 10 seconds, you get full stamina (meaning you can
sprint the entire time), and attacks against you only inflict half damage. Yes,
that's right, half damage. So if you have 3+ medics on your team and you have
level 3 battle sense, then instead of having just 156 HP, with adrenaline it's
like having 312 HP.
Add to that the fact that you can heal yourself once your charge bar fills up
again, and it will take a mighty
force indeed to bring you down.
There's so many ways you can use adrenaline, so I'm just going to make a list:
Say you stole the radar parts and you're running away with them. If you're low on health, Don't use adrenaline! Use health packs instead. If your HP is critically low, halving the damage against you isn't going to help much, you'll still die pretty quickly.
Once you have adrenaline, you'll obviously also have full revive since that happens at level 3. So, make sure to use plenty of TK revives so that you can save up your power bar for adrenaline, instead of wasting it on health packs. Of course, if you're in a very safe area, then go ahead and use health packs, because you won't be needing adrenaline any time soon.
Rambo Medic:
Some people like to choose medic as their class, but play it more like a
soldier. Medics are excellent at getting into firefights and surviving,
so they can be very effective fraggers. Experienced players with good SMG skills
love to do this, so you see this a lot in clans, or on some of the pubs where
skilled players go. Since being a rambo medic is all about SMG fights, this is a
great class to choose if you want to improve your shooting.
Sometimes people will get pissed at you for playing Rambo medic, when they're lying dead waiting for you to revive them. Personally I think if you're a good gunner, it's okay to be a Rambo medic. If you can be the highest fragger on your team, who really cares if you're doing it with a panzer or with an SMG? You're still helping the team even if you're making the kills as a medic. If you're not really getting a lot of frags though, then maybe you should be a field ops or a panzer. Or, just be a "good" medic.
You should still do what you can to help your team. You might not want to run around monitoring everyone's health, which is fine, but at least if someone is near you, revive them or give them some health packs. You can also be effective by pairing up with teammates instead of running by yourself. For example, you could be the personal bodyguard for your engies. You can still do plenty of fragging since engies are always running into danger, while at the same time you'll be there in case your buddy needs a quick revive or something.
XP whoring:
Medics are definitely the best class for XP whoring. You can easily whore in
first aid with health packs. Battle sense is easy because medics stay alive the
longest. You'll also get light weapons pretty quickly if you travel with
teammates and participate in the fighting.
Good combinations:
Medic + Medic: if you die, your buddy can heal you and vica versa.
Medic + FdOps: you provide health, he provides ammo.
Medic + Engy: helps the engy get objectives completed
Medic + Cvops: if he's trying to infiltrate, you can escort him
Engineer
Weapons: M1 Garand, K43 rifle, grenades
Abilities: constructing, dynamite, landmines, defusing
Pros: lots of great explosive ammo, crucial to objectives
Cons: not easy to use, not too great for XP whoring
Basic info:
Engineers are the most important class if your team is on offense. Every map
involves planting dyno at some point, and often repairing objectives like the
tank, truck, etc. One of the most basic mistakes teams make (especially on pubs)
is not having enough engies. Even on defense, you always want a couple of them
around in case they need to disarm dynamite or construct defenses/barriers.
If you're an engineer, focus on the right thing at the right time. Don't go
blowing up things that your team isn't going to need until later in the map.
Make sure you stay busy! For example, on Battery, don't just hang out around the
backdoor waiting for someone with a uni, if the people in the front are
struggling to get up the assault ramp. If you have nothing to do, plant mines,
go out and support teammates in fights, etc.
Engineers are not the best in combat, but you really have to learn how to defend yourself. You can't just go plant dyno and expect no one to be guarding it. You also shouldn't expect your team to kill all the enemies in your path. They'll do their best to support you, but still you'll be in constant danger. In other words, if you go to the objective and there are 6 guys there so you can't get through, that's your team's fault for not clearing the area out for you. But if you go there and there's 1 or 2 guys defending it, it's your responsibility to kill them.
Learn to use a grenade launcher. Not only do they give you engineering XP (as opposed to an SMG which gives you light weapons) but they are also very nasty in the right hands. You can use them to do all sorts of things an SMG couldn't do, such as bank shots to kill players who are out of view, killing a clump of enemies, clearing out a tunnel or small room, etc. If you are going to plant dyno though, you might actually prefer to use an SMG. Shooting a rifle grenade wastes some of your charge bar; you do NOT want to get all the way to the objective, pull out your dyno, and then sit and wait for your charge bar to fill up.
Try to take medics with you. If you can have a medic trail you from behind, he can often revive you as soon as you die. If your medics don't do this, then follow one of your medics around so he'll be there when you need him!
After you repair a tank, try to get somebody else to escort it while you take cover at a safe distance. Let someone else be the cannon fodder. If you die escorting the tank as an engineer it really sucks because then your entire team has to wait for you to respawn and run your ass all the way back to the tank to repair it. It's hard enough being an engineer, we shouldn't expect them to repair the tank AND escort it through a storm of nades, bullets, and bombs, while everyone else is off doing other stuff.
Constructing
/ repairing:
There are basically 4 things that you have to worry about constructing:
1) Command posts
2) MG nests
3) Tanks or trucks
4) Mission objectives (bridges, railgun, etc)
Make sure to pay attention any time a command post or MG nest gets destroyed. These things tend to help your team, and often people forget to rebuild them. Don't let it become a distraction though; some covert ops purposely satchel your command post over and over just to distract you and hopefully kill you while you're trying to rebuild it. If it happens once or twice, go ahead and repair, but otherwise just focus on the objective.
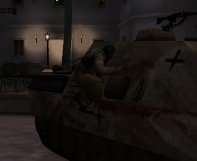
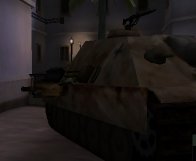
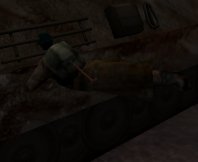
When you construct or repair, always remember that people are going to be all over your ass trying to kill you. So, if you are planting dynamite, go into prone position while you arm it. If you are repairing the tank, run around the tank while you do it. If there are mines around the tank, then jump on to the tank and crouch while you repair it. This can be very effective on Goldrush, here is a couple of pictures showing what I mean:
In the 1st picture, I just jumped on the side of the tank and crouched. The other 2 pictures were just for fun- what I did is after I got on to the side of the tank, I went prone. In the middle picture you can see this causes a weird graphics glitch where my head is buried inside the tank (!)
When you're trying to construct something which is vital to winning the map, don't be a wuss about it. For example, whether you're repairing the tank on Goldrush, building the bridge on Fueldump, or building the assault ramp on Battery, you should charge in like mad and repair it. Even if there's artillery striking all around you, just go in and do it. Quite often you'll die before you finish the job, but that's OK. If another engy on your team can get there soon, then maybe he will be able to finish the job you started. In these cases, you really don't have time to wait for the perfect moment- as long as you're not constructing, your team isn't getting anywhere. So remember, even if each engy only does 1/3 of the job, eventually it adds up.
This is one reason I think it's sometimes good to have multiple engineers on a map. If you have 5 engineers trying to construct the bridge on fueldump for example, it doesn't matter if there's artillery- the bridge will get constructed sooner or later because each engineer adds on to the work of the other engineers.
Planting dynamite:
The basic idea when planting dynamite is to
plant as many as possible, then defend it for as long as possible. This second
part is important- if you plant but you make it easy for the engy to defuse it,
that doesn't help. Here are some ways to help ensure your dyno blows up:
Another good habit to get into is, after you plant the dyno, announce to your team what time it will blow up at. (Just mentally note the current time and subtract 30 from it).
Ragnar-X- made some great screenshots of "trickplants", some good places to plant dyno. Read more about it here.
Here are some guidelines for finding new
trickplant spots:
1) There must be a line of sight between the dyno and the constructible... i.e.
the dyno should be able to "see" the constructible.
2) The constructible must intersect with the explosion radius of the dyno.
Planting landmines:
It's very important to position landmines correctly, because your team only
gets 10 of them, so you don't want to waste any mines. Check out the section on
common landmine spots to find what are the best places to plant.
You have to coordinate with the other engineer(s) on your team. Don't be a landmine hog- it's really annoying when someone hogs all the landmines, especially if they're stupid and put them in bad places. (No offense :p) Also be careful not to place them where a lot of your teammates will be running around (like, in the middle of some area out in the open), because then they might step on them by accident. Even though they should ideally be careful, it really isn't easy to be watching out for landmines in the middle of combat. Someone might run backwards during a firefight and trip off a mine.
Never defuse a teammate's landmine. They usually get really pissed if you do this. However, once in a while it may be useful to defuse your own landmines and re-plant them. Why? Because, if there's a landmine that hasn't been stepped on all game, there's a good possibility it's because it was spotted by an enemy covert ops. So, simply kill it and replant, and now it will be hidden from the other team again.
Defusing:
When you hear dyno planted, try to make a note of what time it is that it
was planted. When you get to the area with the dyno, then:
Also, come with a nade primed and do a quick "spray and pray". This works especially well on Oasis because the rooms with the anti-tank guns are very small. So if an engy is in there, then a quick nade into the room will probably kill or at least hurt him badly. Make sure to check the map before you throw the nade though! If there are teammates in the room then obviously do
It may help to bind a key to say "Which dyno should I defuse first?" or something like that. So, if you are going to defuse and two dynamites have been planted, you can defuse in the correct order. If you're playing in a clan it's a lot easier because people can just tell you quickly over the voice chat.
Also, engies can defuse satchel charges! This may come in handy sometimes. Another way to trick satchels is just to run on them and off them really quick and hopefully the covert will detonate it while you're off it.
XP whoring:
Engineers aren't usually too good for XP whoring. The main reason is that a
lot of objectives are just constructed once, and then that's it. It's a one-shot
deal, whereas for example, medics can drop health packs again and again. Ideally
you'll have objectives that keep getting destroyed by the enemy. For example,
the tank keeps getting damaged so you can repair it again and again. Or, on
Battery, the Axis keeps destroying the assault ramp, so you can repair it.
Other than constructing and things like that, the best way to XP whore is basically make lots of kills with your rifle grenade. Note that, if you use your rifle grenade as a regular rifle (i.e. no grenade attached) then it won't count as engineering XP, it's just light weapons. But if you attach a rifle grenade, launch the grenade, and kill your enemy, you get 3 XP of engineering skill.
If you have lvl 4 battle sense, you can try walking around and defusing mines. This is a decent way to rack up some quick XP.
Good combinations:
Engy + CvOps: the cvops gets a uni, lets the engy into the enemy's base,
then the engy plants dyno
Engy + Medic: everybody's always trying to kill the poor engy, so a medic
can really help
Weapons: MP40/Thompson
Abilities: Ammo packs, artillery strikes (arty), support fire
(airstrikes)
Pros: good fragging, never need ammo, xp whoring, gives ammo to team
Cons: must balance calling airstrikes with giving ammo
Basic info:
A good field ops can give a team a huge advantage. Providing ammo is
crucial- you don't want your teammates losing fights they really should have
won, because they ran out of ammo.
Airstrikes and arty can also be devastating to the enemy team. As a field ops,
you'll have to learn how to balance calling airstrikes/arty with providing ammo.
On one hand, you really need to focus on airstriking the enemy because it's so
important to lessen the enemy's numbers or possibly damage objectives (like
tanks or trucks). However, people constantly need ammo and they'll hate you if
you don't give it to them :)
Ammo packs
Make sure to pay special attention to the
voice chat, and check when someone says "need ammo". Then try to locate them on
the command map and give it to them. One good idea is to place ammo packs on
your way out of the spawn point. That way, you can give your teammates some
extra supply of ammo so that they can last longer without having to call for you
to resupply them. Ammo packs are also a great way to XP whore.
When you are running along and throwing ammo (say, on the way out of the spawn), look straight up and throw the ammo. This way the packs will fall behind you and you won't pick them up yourself. This is usually easier than trying to run backwards and throw packs.
The main people you need to give ammo to are mobile MGs and medics. They spawn with very little ammo, so if you can try to make sure they have ammo on the way out of the spawn, they won't worry about running out. Mortars are also ammo hogs, but you shouldn't waste too much time resupplying them. When they run out of ammo, they can just /kill so they respawn with more ammo. The only time you should bother resupplying a mortar is if you really need more XP.
Support fire (airstrikes)
Ideally you should get 1-3+ frags with each support fire. Works great at
spawnpoint, on top of a tank, near construction, etc. Support fire works best
when the enemy doesn't see the cannister or the smoke coming out of it. So, on
each map there are a few tricky places where you can chuck support fire and
people won't realize you've thrown it until they're shredded. For example, right
against a wall is a very tricky spot because people won't notice it until it's
too late.
One thing to remember: the airstrike flare (the cannister) must be thrown in some area so that the airplane above can see it. So for example, if you throw an airstrike in the path of a tank, and then the tank rolls over the cannister, it will just say "Can't see target, aborting". So, make sure to throw the airstrike on top of the tank.
Level 3 signals is very important, it will make your airstrikes cover much more area, and they will also have a nice big shockwave afterwards. Additionally, it's impossible to cancel a level 3 signals airstrike by lying on the cannister.
You might often get a lot of "hits" with an airstrike which don't actually kill. So, often people coming out of an airstrike zone will be weakened up a bit- use your SMG to finish the job off.
Throw the airstrike about 2 seconds before the enemy spawns, so that it goes off by the time they lose their invulnerability. You can download Heron Spawntimer, to help you time your airstrikes when you are spawncamping. For information about whether Heron is considered cheating, click here.
Airstrikes can be really effective when you coordinate with other field ops. For example, on Battery when you're trying to get up the ramp as allies, two field ops can throw airstrikes on to the ledge while an engy constructs the ramp. This can push the axis away long enough for everyone to get up the ramp without some covert just satcheling the ramp.
One thing you might not know about airstrikes is
that you can control the direction in which the airstrike occurs, by standing at
a different location when the airstrike goes off. The way it works is that the
airstrike always happens in a line which is perpendicular you. I guess it works
that way to ensure that you don't get hit by the airstrike. So, suppose you
throw an airstrike and then stand around until it goes off. This is what it will
look like:

On the other hand, say you throw the airstrike and then move to some other location. Then it will still explode in a line perpendicular to you:

So, if you are throwing an airstrike on a narrow choke point, such as the Axis spawn exits on Railgun, then you want to position yourself off to the side of the chokepoint so that your airstrike reaches into the narrow area as far as possible to kill enemies.
Note the airstrike cannisters do not work
indoors; however in some circumstances you might still be able to use them to
good effect. The cannister itself is like a weak grenade- it does 140 HP of
damage, opposed to a nade which does 250 HP. Also, they can function as a wimpy
smoke grenade.
Artillery strikes
Arty is good for two things: it kills a lot of people, and it blocks off areas,
trapping your enemies. An effective tactic is if to pair up with another field
ops and block off an area that the enemy is trying to get through. It works
great if you have level 3 field ops. Artillery is also very effective for
spawncamping. If you are spawncamping, try to call the artillery approximately
10 seconds before the enemy spawns.
Many players don't take arty as seriously as they should: they'll often run through it because they don't want to wait around for it to end. Use this to your advantage :) Also, turn off cg_wolfparticles (see the "Scripting and Tweaks" section) so that you can shoot people on the other side who are waiting until the arty clears.
When you fire for effect (FFE), do it quickly, don't stand there looking through your binocs for very long. A stationary target is just going to tempt any panzers/MGs/snipers to get you.
General tips on airstrikes/artillery
Whether you are calling arty or support fire, you should always yell "Fire in
the hole!" (v15). This alerts your teammates so they can run away if they are
too close to it. Try not to call arty on routes that your teammates have to go
through. Don't assume that they will be smart enough to wait til it's over: they
won't!
If you want to stop a moving tank, you should ideally use support fire instead of firing for effect. FFE is not good because by the time the first strike occurs, the tank will have moved away from that spot. Even if you decide to get clever and you call the arty somewhere to the front of the tank, there's always a chance that it won't damage the tank completely. Using support fire is also good because the blast occurs pretty soon after you toss the cannister, so that way you don't give the tank much time to move.
Once the tank is stopped though, then FFE is the best option because it lasts for a long time, so for a window of 15 seconds or whatever, you'll be able to hold off any engies who are trying to repair the tank.
Weapons: Sten, FG42, K43
Abilities: satchel charges, spotting enemies and landmines, stealing unis,
smoke, sniping
Pros: infiltration, destroying objectives, and annoying the
other team :)
Cons: weapons are more difficult to use, not great for fragging or XP
Basic info:
Covert ops have some powerful abilities, and in the right hands, they can be
very useful. Sadly, they are probably the least "necessary" class, so you almost
never see them in clan matches because with only 7 guys on a team you can't
afford to have some guy running around destroying command posts. Also, in clan
matches, clans always make it a practice to include everyone in their fireteam,
so they know who's on their team by the fireteam symbol above their head. So,
you can't go sneaking around, people will know it's an enemy in disguise
instantly! Even on a pub, if you want to play covert ops that's cool, but keep
an eye on your team and if you see that you have 3 covert ops and 1 engineer,
switch to engy for a while.
Here's are some things coverts are great for:
If you're on allies, you should try to help your team's engineers as much as possible. If you think about it, the covert ops is very well-suited as a support role for engineers. You can help by providing smoke, opening enemy doors, planting satchels on top of their dyno so you can blow up enemy engineers trying to defuse, spotting landmines, providing sniper cover, eliminating mobile MGs or other nuisances, satcheling a enemy command post so an engy can build it (e.g. side entrance on Radar), or just accompanying the engineer and watching his back. Another thing you might try is satcheling an objective or command post right before one of your engies plants dyno. This may help to distract the enemy engineers and get them running in the wrong direction.
Now let's take a close look at each of the covert ops abilities...
Spotting enemies
This is something people neglect but
it's pretty helpful- if you see enemies then they will appear on your team's
compass map. This can help mortars know where to target, etc. Keep in mind though that
the information you provide your team is only as good as their ability to use
it. So, on a pub, it's less likely that people will even look at the map since
many players are noobs.
It also helps if there's an enemy hiding somewhere. Even though he might be difficult to see to your eye, he's still visible on your compass map. So for example, once I was playing as covert ops and as I spawned, I noticed an enemy nearby on my compass map. So I immediately went and killed the spawncamper before he could do any harm.
Spotting landmines
This is one of the best reasons for choosing
covert ops. If you can spot all the enemy's mines, it will be a huge help to
your team. Once the mines are spotted, don't destroy them, because that will
only give the enemy a chance to re-plant them. Let them think they're safe, when
really all their mines are useless. Try not to be seen by the enemy when you are
spotting mines- then they will know that their mines are spotted! Also, if you
have a uni and you are seen spotting mines, you lose your uni. Once you have
high-level covert ops skill, you'll be able to spot mines extremely quickly.
Stealing unis
Having a uni is NEVER crucial unless you are infiltrating. If you can get
one without much trouble, go ahead and take it (it's 5 XP and it fools enemies, why not?), but other than that, do
not spend all your time stealing unis. Also keep in mind that the point of a uni
is to confuse the people around you. So, if you have a uni, you should be going
into enemy territory. What you should NOT do is steal a uni and then play
defense. For example, I've seen way too many covert ops steal a uni and then
hang around in the bank on goldrush, which just confuses the MGs and everyone
else playing defense.
Once you get a uni, be careful not to lose it! You WILL lose your uni if you do any of the following:
When you're sneaking around, try to look as natural as possible. For example, suppose the axis are camping some choke point. If I manage to get a uni, then I run through that point backwards. This usually works pretty well, because it fools the enemies into thinking you're one of them and you're just retreating from that point. In general, try not to run towards an enemy, and don't hover your crosshair over your enemy to see if they notice you. Instead, just keep running as if you have some job to achieve. If there are lots of enemies in the area and one of them shoots a "test" shot at you, don't return fire because you'll just get pummeled. Either look at him quickly and keep moving, or duck behind a corner and nail him when he comes.
Be careful of medics. Medics are always monitoring their teammates to see how much health they have, so they're often the first ones to notice an enemy in disguise. Field ops can be a nuisance too because once they have level 4 signals, they get enemy recognition. Once you steal the uni, leave that area soon, so the person you stole the uni from doesn't find you. If you want to be extremely careful, you might even consider blowing up the corpse of your enemy with a satchel charge, since a guy without pants always arouses suspicion.
Use walking to move silently (hold CAPS LOCK while you move). Also, if you hold CAPS LOCK while opening a door, it will cause the door to open without making any noise, and the door will stay open longer. Remember to use your radar since enemies will appear on it to some extent.
Minimize the amount of time you spend running around in the open where enemies can see you. When you're in the open, you should try to sprint as much as possible. So, sprint across some area and then take cover. Once your stamina recharges, sprint some more and then take cover, etc. Also if you're running past some enemy, you need to do it as quickly as possible, so that he doesn't have time to check you with his crosshairs. If he's alone and there aren't many other enemies around, then you might want to run past him, then turn around and pump him a few times in the back while you still have some element of surprise, just in case he might have noticed you.
When you steal a uni, try to memorize the name and class of the person you stole it from. This helps you determine which weapon you should have out. For example, if you steal a medic uniform, but then you run around toting a Garand, you're going to look pretty suspcious. Here's a quick guide to which weapon you should have out for each kind of uniform:
NEVER run around with your knife out. People are always suspicious around guys with knives. In fact, I've even seen people TK someone who had a knife out and then say, "whoops! I thought you were an enemy!"
When in doubt, just use an unsilenced pistol, since every class has one. Be careful once you get akimbos though! Sadly, you can't take the silencers off of those, so if you plan on infiltration, you might consider even just using a regular pistol.
Smoke grenades
Most covert ops barely ever use their charge bar for anything- so you might as
well throw smoke :) Smoke is very useful for giving teammates cover, especially
engineers. Although it obviously won't save an engy against airstrikes/artillery
or grenades, it is usually pretty effective for getting the enemy to stop
shooting at him because they won't want to waste ammo shooting blindly. It may also be a good distraction
(i.e. throw smoke in one area, then go somewhere else). Smoke is also excellent
for cover against MGs. Unfortunately, I think that may change a little with the
new version of etpro which has hit sounds. Because, now MG's can fire into smoke
and they'll know if they're hitting you.
When you throw your smoke cannister, almost always you should charge it up before you throw it. It works just like priming a nade- hold your fire button down for a few seconds and then release it. This way smoke will start coming out instantly and you don't have to wait 5 seconds.
Satchel charges
Satchels can be a lot of fun, personally I think they are superior to knives
for sneaking up on people and killing them. Knives will give you 3 light weapons
XP whereas satchel charges give you 3 covert ops XP. You can also use satchels
like a grenade (just run by someone, drop a satchel, and detonate
immediately) although I think they're a bit easier for an enemy to run away
from. One place you can probably do very well with a satchel is at ammo and
health cabinets. You can usually count on the enemy staying there for a few
seconds, long enough for you to hopefully satchel them!
The main use for satchel charges though is destroying objectives. For example, the footbridge on fueldump, command posts, etc. You can also destroy watchtowers, which also kills whoever is manning the watchtower MG. The best place I know for satchels is when you're axis on Battery, you can keep the Allies from getting up the ramp by jumping in and satcheling it every time the ramp is built.
One strategy some people like to do is blow up the enemy's command post repeatedly to distract the enemy engineers. Also, when they come running to rebuild it, then the covert ops sneaks in and kills them. This may work well on a noobish server. I wouldn't recommend spending too much effort on this though, because it takes you away from other things you could be doing. The only time I'd say it's crucial to satchel a command post is if you need to build it for your team as a spawnpoint. (e.g. side entrance on radar)
Sniping
Sniping can be a very useful ability IF used properly. What you should avoid
is sniping for the sake of fragging, and just doing that for the whole map.
Sure, it's kind of nice that your kill/death ratio skyrockets when you snipe,
but if all you're doing is making lots of kills, you would probably get more
frags as a soldier, and the enemies you kill would get gibbed more often. So, when you snipe, try to think about how it helps the team.
Are the people you're sniping crucial to your enemy's team? Are they difficult
to kill by other means? Why are you sniping?
Here are some ideas on how to use sniping effectively:
Which weapon to use?
A common topic of debate is which covert weapon is best. It pretty much depends
on which one you're best at using, and what you plan to use it for, so it's
somewhat of a moot point. But, here are some guidelines: