Map-specific Trickjumps
Here, we'll go through some of the best-known trickjumps and talk about how to
do them, along with demos. This isn't a list of every single trickjump in the
game, just some which seemed worth noting.
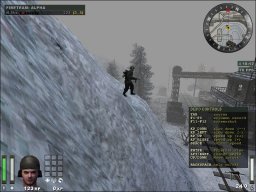
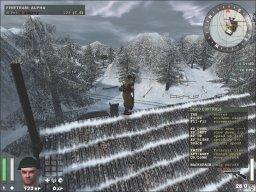
Battery
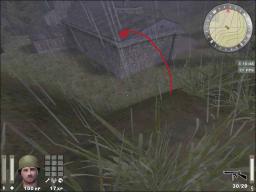
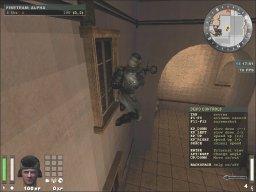
Trickjump #1: Jumping into the upper room w/ the
MG
Difficulty: Easy
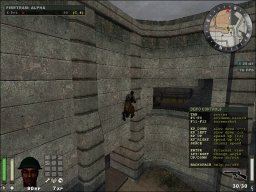
This is a very easy jump to do in that you don't have to have perfect form,
and there's no bunny hopping involved. Be careful not to rush the first jump.
You only need a sprint jump to get to the first ledge, not a strafe jump. As you
land, crouch. This helps to prevent you from just running off the ledge as soon
as you land. Then slowly crouch and move out as far as possible so that you can
make the second jump. If you practice this jump and you remember not to rush it,
then this is a pretty easy jump, assuming no one is in that upper room shooting
at you :)
Download
battery_upperroom.dm_83
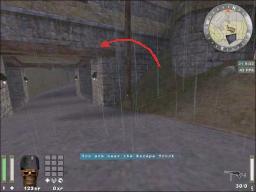
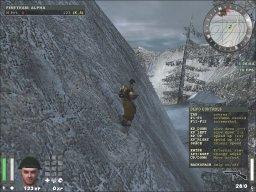
Trickjump #2: Getting up the beach without the
assault ramp
Difficulty: Hard
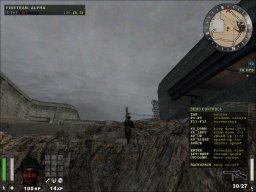
This jump is very hard to get correctly. It took me so many tries to make a
decent demo of it that I started recording my jumps in three's so I didn't have
to hit my "demo record" key every time I tried a jump. The key to this jump is
basically having perfect form + perfect angle of approach.
Here is the demo, as you can see there are 2 bad
jumps and then finally on the 3rd one I just barely got it:
Download
battery_noramp.dm_83
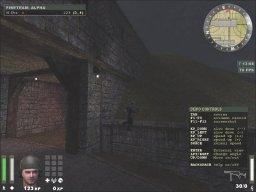
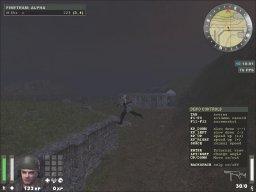
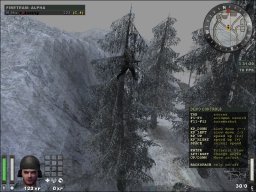
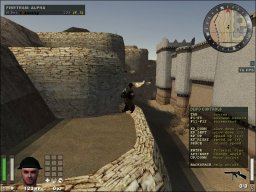
Trickjump #3: Jump to the ventilator
Difficulty: Easy

This jump may be useful as a panzer spot, if Allies break past your main
defense and start pouring in. Credit to
Ragnar-X-
for this screenshot.
No demo available yet
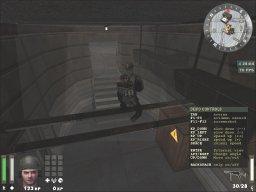
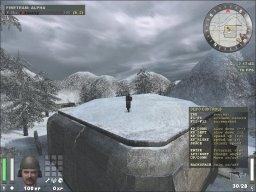
Radar
Trickjump #1: Getting on high ground near main
entrance
Difficulty: Easy
This is just a very simple, but useful strafe jump that you can use if you
are currently on low ground near the main entrance and want to get to high
ground.
Download
radar_mainentrance.dm_83
Trickjump #2: Jumping to the west radar parts
Difficulty: Easy
For this, you have to back up as high as you can and then do a 2-part bunny
hop to get to higher ground.
Download radar_jump.dm_83
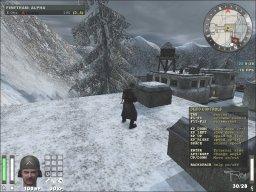
Trickjump #3: Jumping on the garage roof
Difficulty: Easy
This is a CSJ that lets you get to the east radar without stepping on any
mines, by jumping on top of the garage roof. Screenshot by
-Ragnar-X-,
and demo by [G-TAP]Genocide.
Download
geno_trick_jump_radar.dm_83
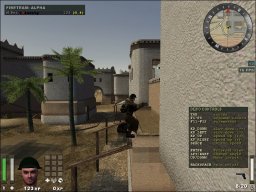
Trickjump #4: Jumping on ledge above passage
to main entrance
Difficulty: Easy
This jump lets you camp the area near the truck and main entrance- great for
panzer! Thanks to
Ragnar-X-
for this screenshot.
No demo available yet
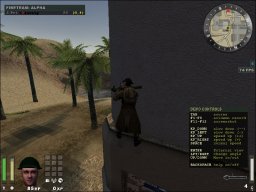
Trickjump #5: Good camping spot for panzer
Difficulty: Medium
Here's a cool jump, submitted by Ragnar-X-.
It takes some work to get into this spot, but it can come in pretty handy for
camping the axis spawn.
No demo available yet
Railgun
Railgun doesn't really have lots of good trickjumps.
However, there are some good places where you can get on to high ground, so I'll
mostly go over those.
Trickjump #1: Getting on high ground (A)
Difficulty: Easy
This is very easy, just run up the slope, no jumping required.
Download railgun_highground_a.dm_83
Trickjump #2: Getting on high ground (B)
Difficulty: Easy
This is the infamous jump which gets you into a tree. Personally I think
it's kind of lame to go through all this trouble- good players will easily spot
you in the tree. However, against newer players it might be useful.
Download railgun_highground_b.dm_83
Trickjump #3: Getting above the command post
Difficulty: Easy
This is a really useless trickjump that lets you get above the command post
on railgun... I am including it since it's kind of an interesting jump and maybe
it might work against some ppl... But personally I think your position is too
obvious if you do this jump.
Download railgun_above_commandpost.dm_83
Oasis
Oasis is a great map for trickjumpers- particularly
in the old city where there are lots of high ledges and things like that.
Trickjump #1: The Oasis Walljump (bunnyhop)
Difficulty: Medium
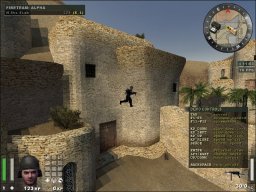
This is one of those great jumps that totally freaks out the other team, and
can change the course of an entire game. It takes some practice to get right if
you are new to trickjumping so you may want to attempt this only after you've
practiced on other jumps.
The easiest way to do this jump is as a 2-part bunny
hop. In this case, the important thing is to make sure that you time your first
jump perfectly so that you land at the very edge of the ledge closest to the
wall. Note that the first jump can just be a sprint jump, doesn't have to be a
CSJ. When you land, then you need to do a CSJ to make the huge leap to the top
of the wall. Try to aim to land on the lowest part of the wall.
Download oasis_wall.dm_83
Trickjump #2: The Oasis Walljump (single jump)
Difficulty: Medium++
It's possible to do the Oasis walljump without a bunny hop, just a single
jump. This is much harder, because now you start with no momentum, so to do it
properly you have to have a very good CSJ form and good timing. Nexu (a.k.a.
Venom) has kindly contributed a video (AVI) of himself doing this jump. It's
done with timescale=0.5, so you can see what's going on more clearly.
Download
oasis_wall++.avi
Venom also sent me a demo of him teaching some guys
on a pub how to walljump. It is a very nice demo, which features him doing the
walljump in 3 different ways: forwards bunny hop, backwards bunny hop, and
single jump. He also does a lot of other cool oasis trickjumps in this demo,
some of which are covered below and a couple which aren't. This demo is pretty
long (maybe 15-20 minutes I think) so you'll have to use the demo controls to
fast forward through a lot of it since there's lots of goofing around and random
silliness :)
Download walljump-fest.rar
Trickjump #3: Inverse Oasis wall jump
Difficulty: Medium
This jump is useful for getting back into the old city and recapturing the
flag for example, if you're Axis. This jump was submitted by
Ragnar-X-
No demo available yet
Trickjump #4: Entering the Old City (A)
Difficulty: Easy
This shows 1 way to enter the old city. It's nothing special but by making
big leaps as shown in this demo, you can avoid mining spots.
Download
oasis_entercity_a.dm_83
Trickjump #5: Entering the Old City (B)
Difficulty: Easy
This shows another way to enter the old city. Here, we jump down from the
high ledge on to the doorway of the small entrance leading to the old city. The
nice thing about jumping on the doorway like this is that it lets us jump over
all the dirt area which might possibly be full of landmines. May not be
practical if you aren't comfortable with doing this jump, but in any case it's
an interesting jump to try...
Download
oasis_entercity_b.dm_83
Trickjump #6: Getting on high ground (A)
Difficulty: Easy

This jump lets you get on a rooftop above the old city. From here you could
panzer or something, to catch anyone trying to sneak in to the old city.
Probably more work than it's worth but in any case it's another interesting
jump.
Download
oasis_highground_a.dm_83
Trickjump #7: Getting on high ground (B)
Difficulty: Easy

This jump puts you at pretty much the highest point in the old city. The
only downside to this position is that enemies can easily panzer the ledge where
you're standing.
Download
oasis_highground_b.dm_83
Trickjump #8: Getting on high ground (C)
Difficulty: Easy
This is probably the most practical way to get on to high ground if you are
defending the old city as Axis.
Download
oasis_highground_c.dm_83
Trickjump #9: Getting on high ground (D)
Difficulty: Easy
Here's one place you can perch up on, great if you are panzering.
Download
oasis_highground_d.dm_83
Trickjump #10: Getting on high ground (E)
Difficulty: Hard
This is a pretty crazy jump using a bunny hop to get on high ground in the
axis base. Of course, you could get to this location by just going to the 2nd
floor of their base and then hopping down. This is pretty fun to try though.
Download
oasis_highground_e.dm_83
Trickjump #11: Getting on high ground (F)
Difficulty: Medium
This jump may be somewhat useful if you want to be a panzer, although it's
probably more work than it's worth. The jumps itself are easy, the hard thing is
crawling on the ledge without falling off!
Download
oasis_highground_f.dm_83
Trickjump #12: Faster route to north AT gun
Difficulty: Easy
This is a pretty cool jump that lets you jump to the north anti-tank gun,
skipping the room before it. This way, if some enemy is camping that room
waiting for you, you can go behind them and sneak up on them. If I recall
correctly, there was a very cool snippet of this in the KP trickjumping video.
Download
oasis_northgun.dm_83
Goldrush
Trickjump #1: Getting to panzer location
Difficulty: Medium
This is a cool jump where you can crouch on a windowsill with a panzer, so
high that your head almost touches the ceiling. As you can see in this demo,
this involves 3 separate jumps. First you have to get on top of the crates, then
jump on the lantern, and then finally jump on the windowsill. To jump on the
crates, all you should have to do is a regular jump. Nothing fancy here, no
strafe jump or anything. Just make SURE that your FPS is either 43, 76, 125, or
333. Remember, these are the trickjumping magic numbers. If your FPS isn't one
of those, you may not be able to get on the crates, no matter how hard you try.
The jump to the lantern is pretty simple, a strafe jump will work, even without
sprinting. Finally, jump to the windowsill. To do this, try to crouch and slowly
edge away from the wall so that you have some space to maneuver. Right when you
are about to hit the windowsill, hold the crouch key. You can't stand on the
windowsill because you are too tall to fit there, so you can only do this jump
if you crouch right as you land.
Download
goldrush_panzer.dm_83
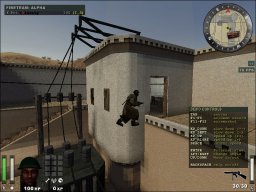
Trickjump #2: Getting to flamer location
Difficulty: Easy
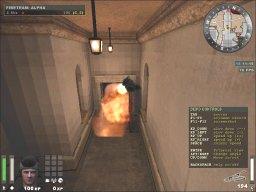
If you want to flame/panzer the main entrance, here's a trickjump that will let you
do it. I strongly am against flamethrowers though, because they tend to get
really messy and by flaming the main entrance, you might block teammates who
want to go out to throw airstrikes or whatever.
Uhh, by the way, in the demo, it looks like the
flames are hitting the wall and engulfing me. This is actually some sort of
glitch- the flames are actually hitting near the main entrance, despite what it
looks like :p
You can also jump on top of the doorway, as
shown in this screenshot that
Ragnar-X-
sent:
Download
goldrush_flamer.dm_83
Trickjump #3: Hopping down the big hill
Difficulty: Easy
Here's a demo of bunny hopping down the big hill on goldrush, as I talked
about in the "bunny hopping" part of the trickjumping section. If you press
ENTER to see the demo in 3rd person view, you can see the characteristic feature
of bunny hopping: when my legs hit the pavement, they stay stuck in the same
pose, instead of switching to a walking animation before the next jump.
Download
goldrush_hillhop.dm_83
Trickjump #4: Getting across the courtyard
Difficulty: Medium

When it's time to rush the bank to steal the gold, one of the hardest things
is getting across the courtyard alive. So, you want to try to get past the
courtyard as quickly as possible. This bunny hop allows you to do that. The idea
is that you do a bunny hop, springing off of the stairway slant to give yourself
momentum. In 2 hops, you can get all the way across the grassy portion of the
courtyard. Then, 2 more jumps will get you to the end.
Download
goldrush_courtyard.dm_83
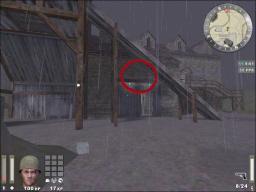
Fueldump
Trickjump #1: Getting on top of the health/ammo
shack
Difficulty: Easy
This is a neat little bunny hop that lets you get on top of the health/ammo
shack near the original Allies spawnpoint. From here maybe you could call arty,
snipe, or just impress all your noob friends :)
Download
fueldump_shackjump.dm_83
Trickjump #2: Getting to high ground on
footbridge path
Difficulty: Easy
This isn't really a trickjump, just some place where you can run up a hill
to get to really high ground on the path from the Allies initial spawn to the
footbridge. This may not be too useful; however, sometimes suppose the Axis
start pestering you by coming down this route. You could perch up on this hill
and panzer them, or lob nades.
Download
fueldump_footbridgehill.dm_83
Trickjump #3: Getting on top of the Allies Garage
HQ
Difficulty: Easy
With 2 bunny hops you can land yourself on top of the Allies garage HQ (the
building which houses the Allies command post). As with almost all jumps
involving 2 hops, you need to be careful not to overdo the first jump. If you
try to go very far on the 1st hop, you will hear the sound of your legs
crunching and lose some health. Also, it's important that your 2nd hop is done
as a proper CSJ, with strafe and sprint held, and a nice mouse flick.
Download
fueldump_garage_hq.dm_83
Trickjump #4: Getting to the roof of the fueldump
Difficulty: Hard
This is probably the hardest trickjump I've seen. This allows you to jump on
to the roof of the fueldump, so if you are an engy, you could get into the
fueldump without the entrances being blown, and without a covert ops.
The standard way to do this jump is using 2
bunny hops. I can't do this jump myself, so Rein Inze has kindly
contributed a demo showing how to do it. This demo uses standard etpro settings,
so it is completely authentic:
Download
fueldump_roofjump.dm_83
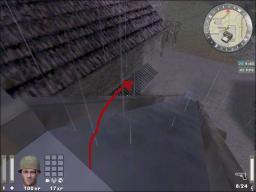
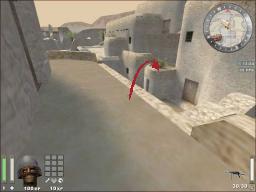
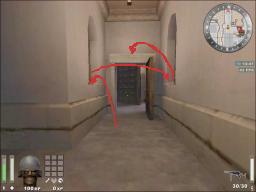
Trickjump #5: Jumping over the East defenses
Difficulty: Medium

This jump involves going over the barbed wire and then jumping down into the
east defenses. Each time you take damage from the barbed wire costs you 25 HP.
If you do this jump perfectly, you'll only get hurt once, so you'll lose 25 HP
doing the jump. If you're sloppy though, you might get hit 3-4 times, which
could kill you if you're not at full HP. So although the jump is easy to do, I
listed it as "Medium" difficulty because you might get sloppy and take damage if
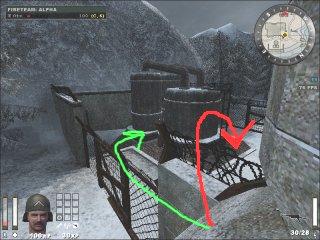
you don't do the jump perfectly.
As you'll see in this demo, I actually hit the wire
2 times. If I had been less sloppy, that 2nd time would have been avoidable. If
you wanted to do this perfectly, the key is to AVOID taking the red-colored
route in the picture below. Instead, take the green-colored route. In other
words, jump straight out until you clear the higher strip of barbed wire, and
then turn right to clear the wall itself. In the demo, you can see I tried to
follow the green route, but my jump was a bit clumsy so I just barely grazed the
barbed wire on my way in.
Download
fueldump_eastdefenses.dm_83